How often are you looking for PSD Mockups to make presentations of your products? If you are doing it quite often, this PSD Mockup creation lesson will be great exactly for you.
There are lots of very detailed instructions for those who are already in the subject and of course for beginners in working with PSD mockups.The main idea of the mockup is to create presentation of the image of the product in the right perspective, in the right situation, and with apply your design to it. The best variant is to use Photoshop for creating such mockup. This program allows you to make lots of changes, overlay modes, distortions, effects and the using of many other tools for customization.
It is important to know that using professional programs as Photoshop, gives you lots of opportunities. Using the legal version of this program, you really save, because you can make professional manipulations and be sure that your design will turn out the way you have intended. This way is more convenient and reliable.
Photoshop provides several types of tariffs convenient for both novice designers, businessmen, who need Photoshop for creating advertisement, and for professionals in their field. By the way, there is an opportunity to choose a plan for schools and universities and save a lot! Follow the link to get more information: Get Photoshop as part of a Creative Cloud single-app plan for just US$20.99/mo.
So, don’t waste your time and start working as a professional designer right now. All you need is to have enough patience to learn fresh material and get ready for new challenges! Let’s start our PSD Mockup Creation Lesson:
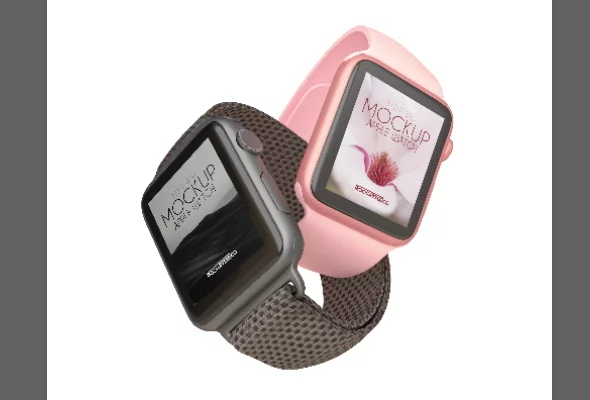
1. For creating the mockup, it is necessary to have a base, on which you should add your design. Many different images for mockups can be taken there https://stock.adobe.com/. While registration, you can get free 10 images. In this lesson we will work with Apple Watch, in which we will change the display in the Photoshop program. If you don’t have Photoshop, it is possible to download it following the link Get Photoshop as part of a Creative Cloud single-app plan for just US$20.99/mo.
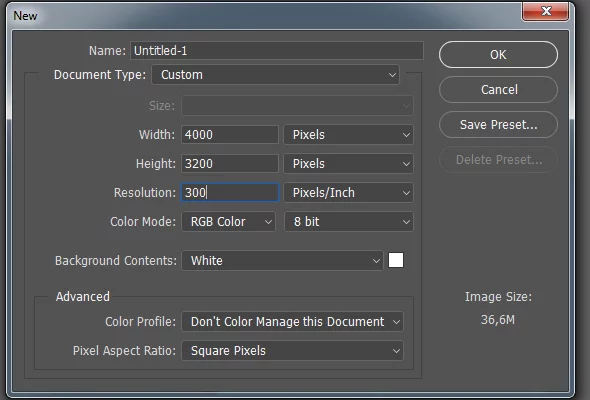
In the beginning, open Photoshop and create a new file with sizes 4000х3200, 300 dots per inch (You can create any resolution for your needs). Open the “File” tab and select “New …”, then write the required parameters for your created document.
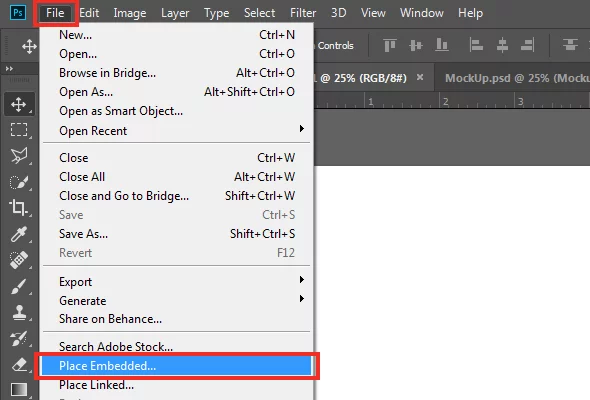
- Now we need to work with the Watch. You can create 3D Model or download any you like from the Internet. We will use the Watch with a transparent background, so that in future it will be possible to change the background color. Open «File» tab and choose «Place Embedded…» («Place» in Photoshop CS6) to add the Watch to your document.
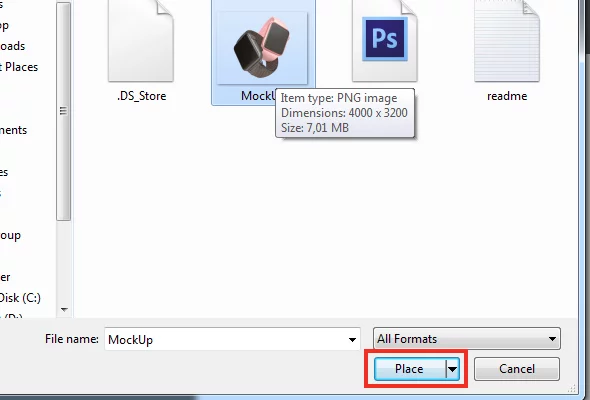
After this, choose the necessary images on your computer (now we have the Watch) and press the “Place” button.
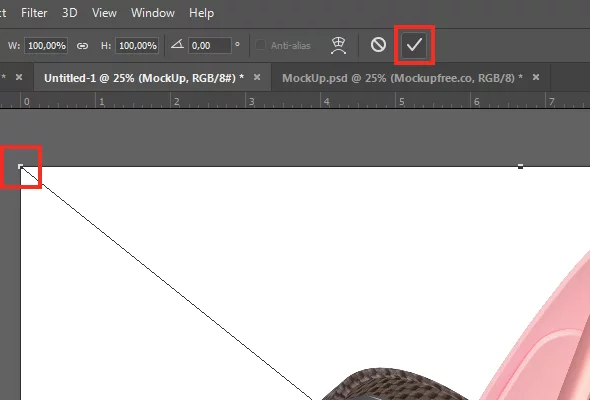
Before use, the image can be transformed by pulling it around the corner. While scaling, the image can change the aspect ratio, so it is necessary to hold down the Shift key.
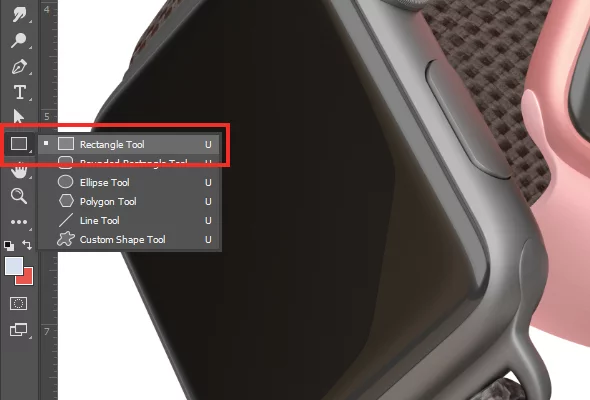
- Now we will add the base of our screen. For this, choose the tool «Rectangle Tool» and draw an arbitrary square over the Watch.
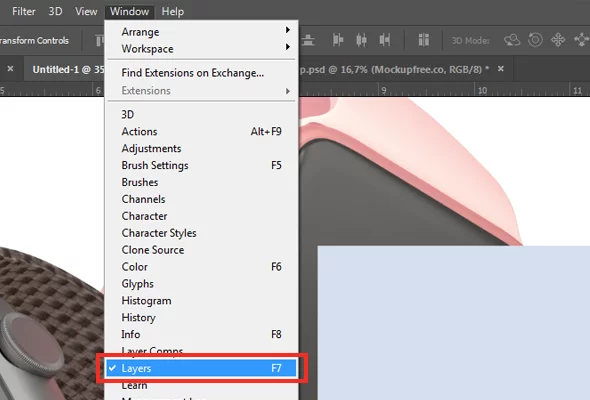
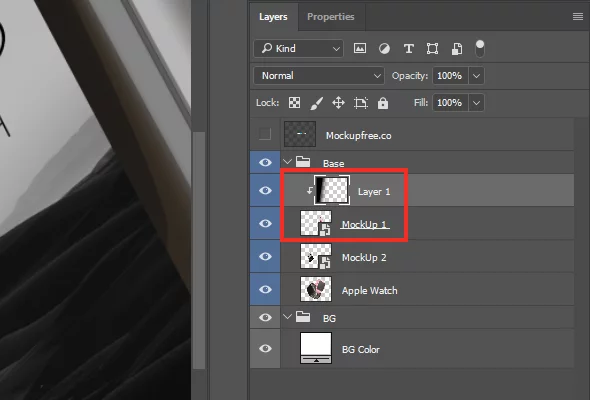
After this, we need a Window with Layers. If you can’t find it on the Photoshop panel, the layers can be shown with «F7» key or open «Window» tab and choose «Layers».
In Layers find the square and convert it to a Smart Object. For this, click the right button on the layer and select the item “Convert to Smart Object”.

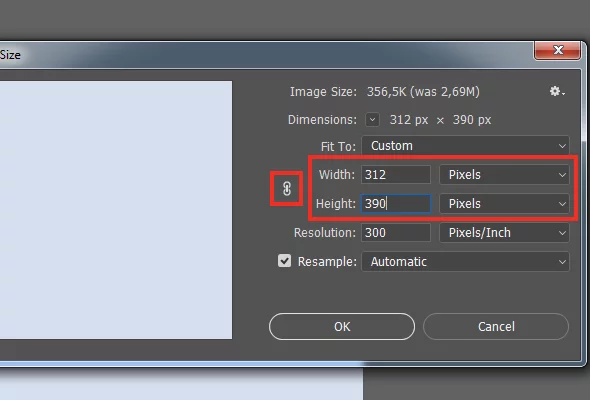
For the Apple Watch screen, it is used a resolution of 312×390 pixels. That’s why, fit our square to this size. Open Smart Object (double-clicking the left mouse button on the thumbnail of our square) and choose «Image Size…» in the tab «Image».

In the opened window choose 312×390 pixels. To remove the binding to the aspect ratio you should click on the chain.
Press «ОК» and close the square, while retaining the changes.
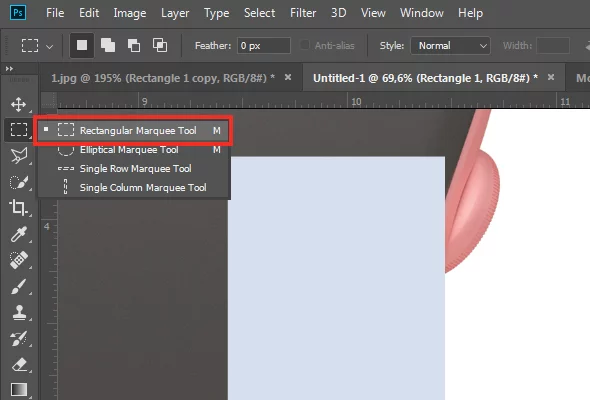
- Now it is necessary to transform the layer to the Watch screen. Choose the «Rectangular Marquee Tool» for this.
After this, click the right mouse button on the image and select “Free Transform”. You can also use hot keys and, instead of this, you can press “Ctrl + N”.
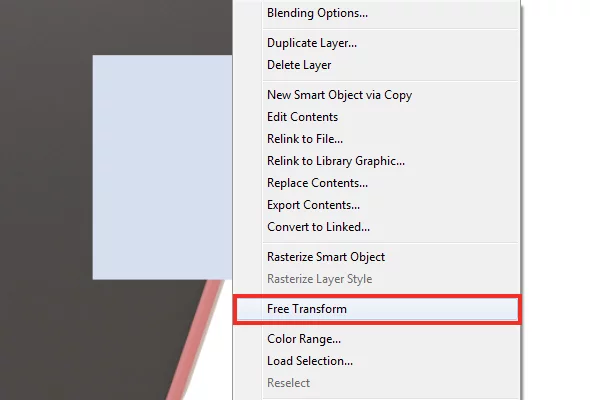
Click the right mouse button again and choose «Distort».
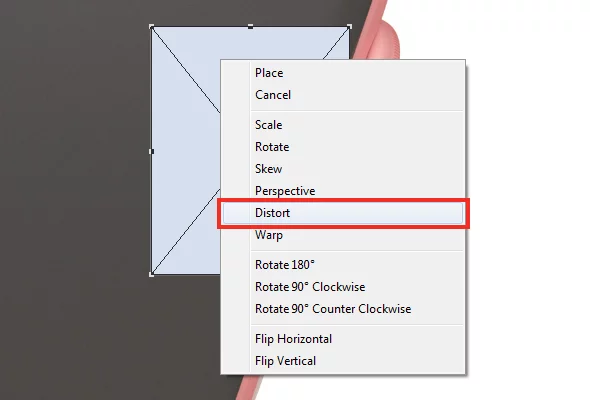
Now we will transform our smart object on the display surface. Each corner is moved to the angle of the Watch display.
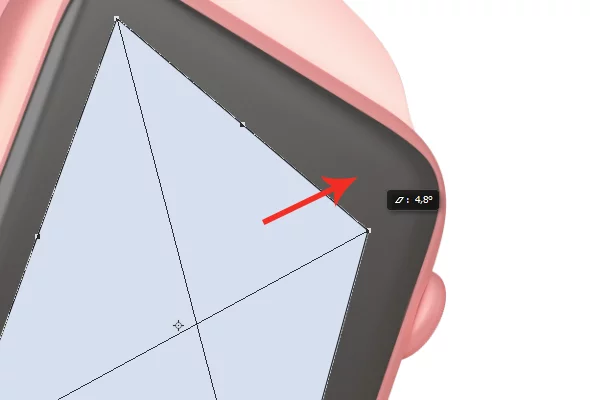
Here we have the Watch Screen with the appropriate resolution and the correct perspective.
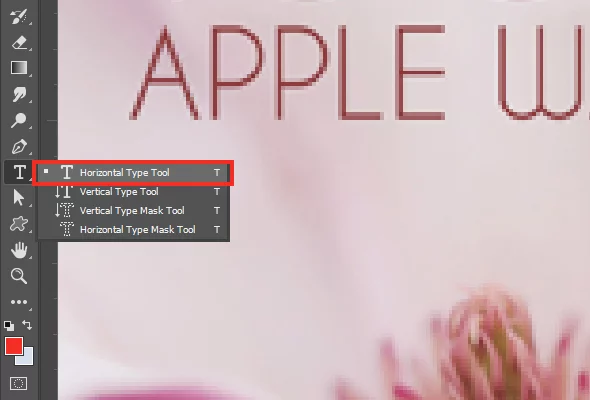
- Now let’s add our design to the smart object. Open it in «Layers» windows by double-clicking on the thumbnail of the layer. Then add there the image the same way as we have added the Watch. Also, you can add the text using «Horizontal Type Tool».
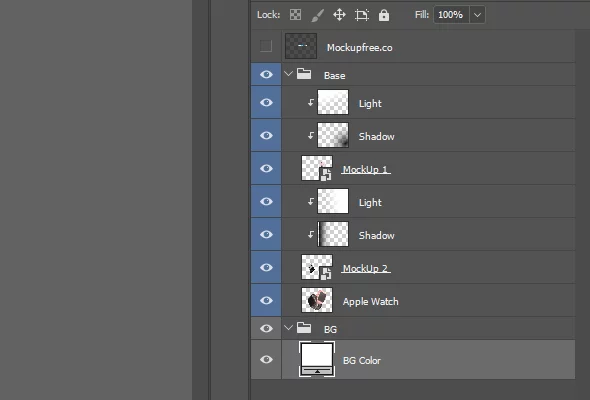
Close the window saving the changes. Make the same manipulations for the second Watch.
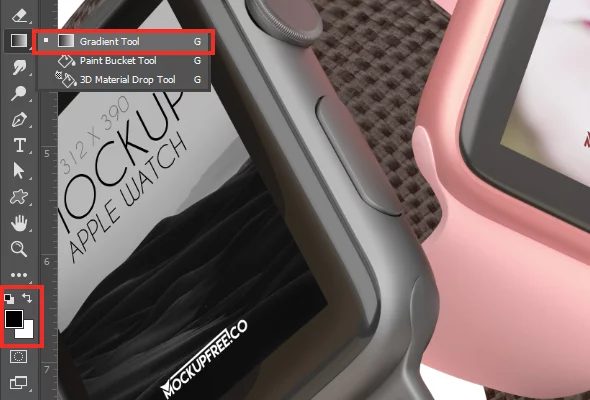
- To make it more real it is possible to add light and shadow on our smart objects. Create a new layer as you can see on the picture below over the smart object to which this will be applied.

Now we will draw a shadow. Take the «Gradient Tool» and choose black color.
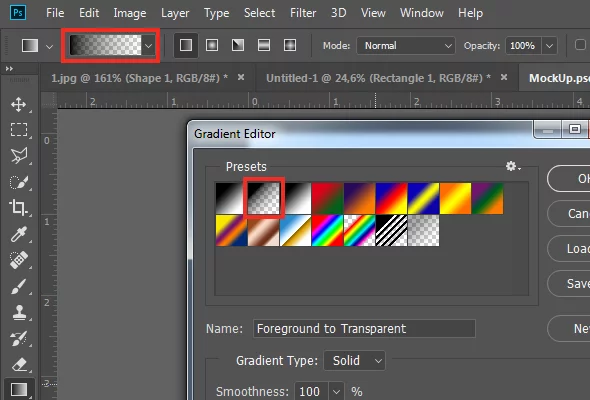
Select a translucent gradient by clicking on the top bar of Photoshop on the gradient strip and selecting the appropriate option.
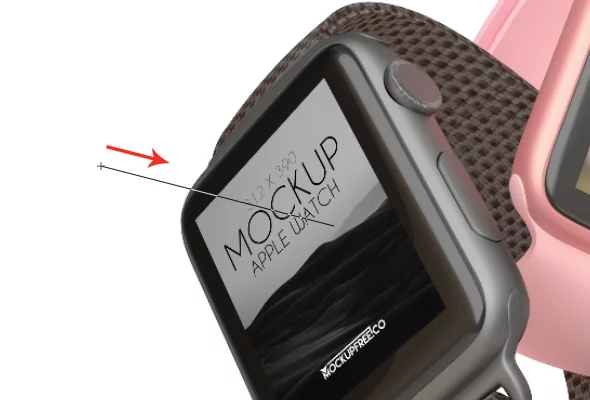
Holding the left mouse button, drag it in the direction of decreasing the shadows.
The appeared gradient will be not only on the display, but over all the other objects. To apply it only for the smart object, it is necessary to click the left mouse button while holding down the «Alt» key between the gradient layer and the smart object. Now you should get this:
Let’s make the same for the light, drawing a gradient with white color for the second smart object.
Also it is possible to add a glare. To make this, select it on the Watch using the tool “Polygonal Lasso Tool”.

Using this instrument, draw a closed area and copy the selected area by clicking the right button and selecting “Layer Via Copy”.
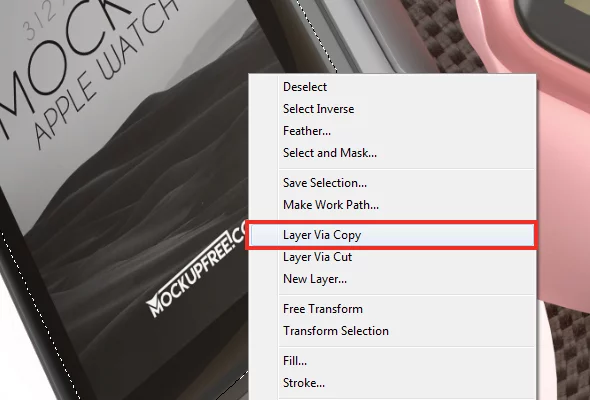
After this, apply this layer to the smart object, the same as we did light and shadow, with the “Screen” overlay mode.

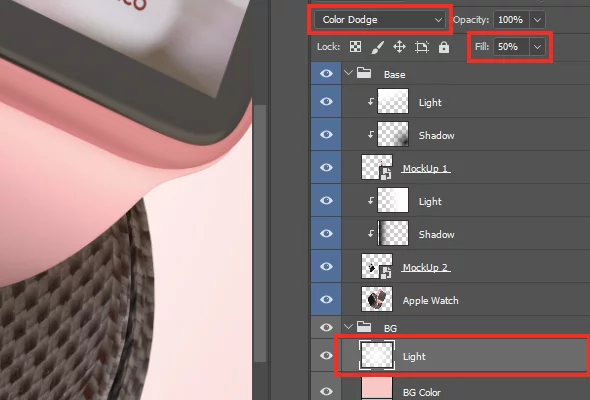
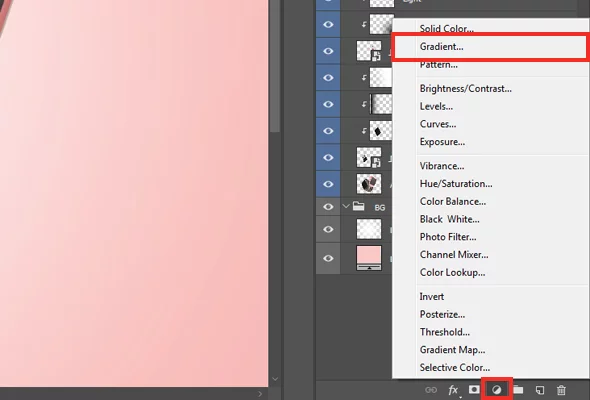
- Change the color of background. For this, add pink color to the lower layer.

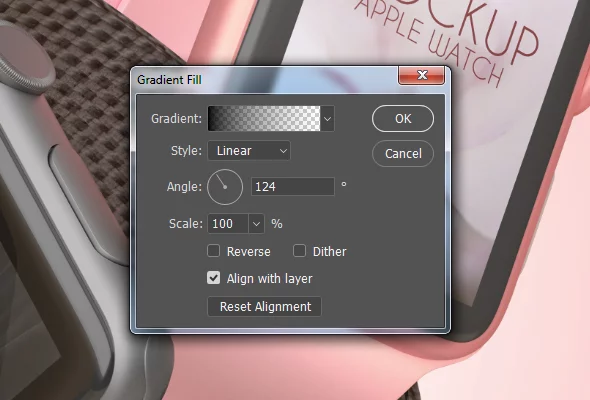
Over the pick color add radial white color gradient. Select it on the top panel of Photoshop and draw a gradient from the center.
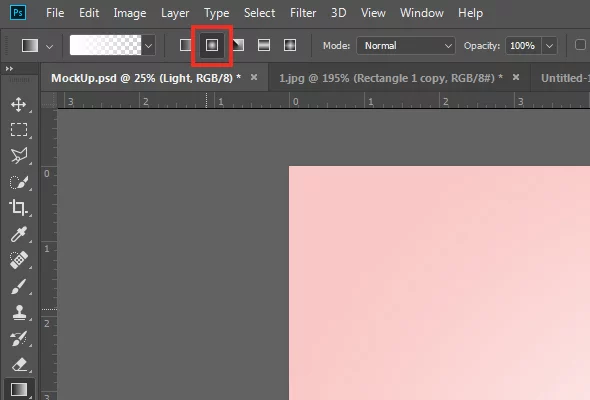
Apply the “Color Dodge” mode to the layer and reduce the opacity to 50%.
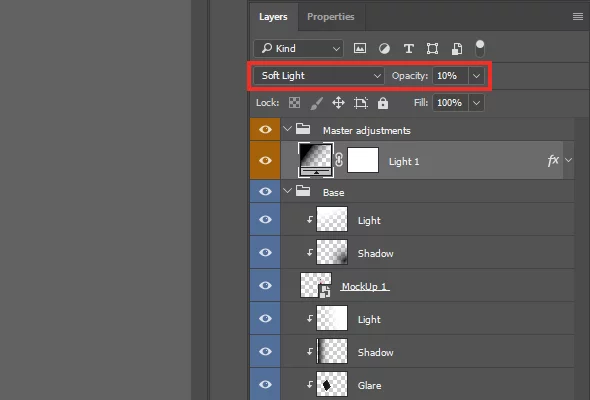
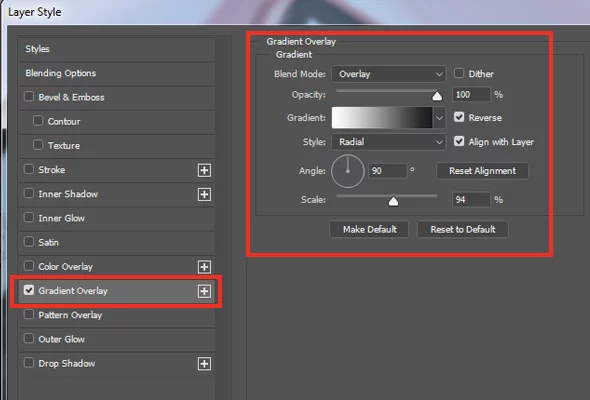
- We are almost finished. Now let’s add a little contrast to the mockup. Add semi-transparent gradient over all the layers.
Make such settings:
Change overlay mode to “Soft Light” and reduce the opacity to 10%.
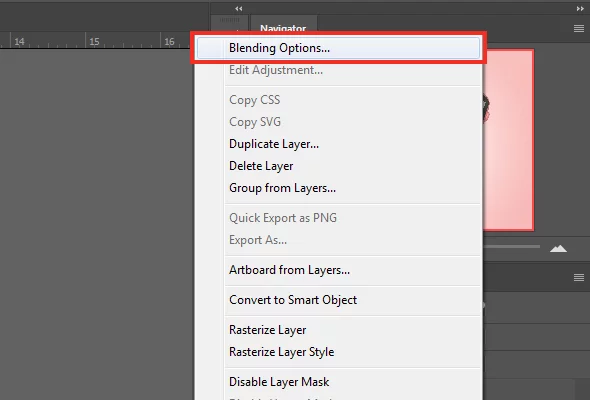
Now open «Blending Options…» and add gradient with the settings specified below:
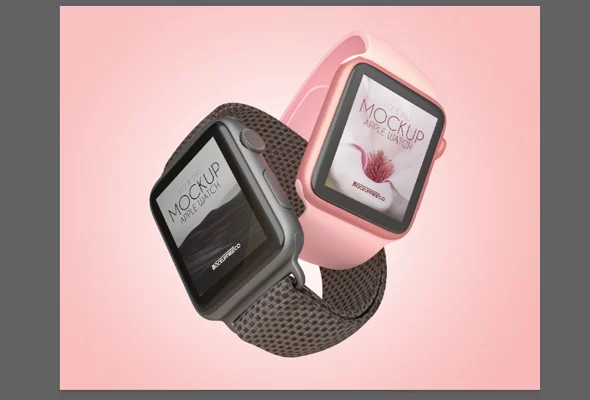
- Congratulations! Now you know how to create great-looking mockups.
Thank you for your attention!